Building Toolchain For BeagleBone Black using yocto project
Hello All,
In my previous post we have seen that how we can construct an embedded linux image for beaglebone black using yocto project and boot it on QEMU(without using the actual hardware).
In case you missed my previous post, you can view it from here: https://beagleboneblackonqemu.blogspot.com/2022/03/constructing-embedded-linux-image-for.html
In this post, we are going to see how we can construct a toolchain for BeagleBone Black using yocto project.
Before moving forward we need to understand few things
1. what is a toolchain?
A . Toolchain a set of tools that compiles the source code in to an executables that can run on your target devices and includes a compiler, a linker and run-time libraries.
2. what toolchain will do? what is cross-compilation?
All our applications are build on host system(such as x86) , but they produce binary code (executables) to run on different target(such as ARM). This process is called cross-compilation and it is necessary to build the embedded software.
Lets build a toolchain for BeagleBone Black using yocto project
There are couple of methods how we can deal with toolchain
1. Obtaining a pre-built toolchain from yocto website
2. Building a toolchain from scratch for your desired architecture
lets see the first method, how we can get the toolchain from yocto website
step 1 : Browse the url https://downloads.yoctoproject.org/releases/yocto/
Here we can see the different yocto releases as below
Go to directory yocto-3.4.2 release which is the latest one and open toolchain folder and open x86_64 folder.
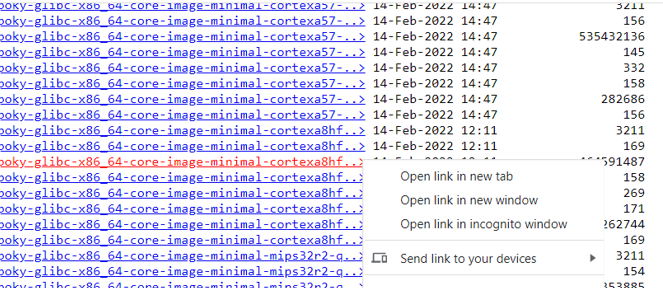
Inside x86_64 folder we can see a lot of pre built toolchains according to their architectures
From here select the BeagleBone Black toolchain and copy the link address of it.
Now in your host pc , download the toolchain as followed:
1. create a directory names as bbb_toolchain
$ mkdir bbb_toolchain
2. Go inside the directory bbb_toolchain
$ cd bbb_toolchain
3. use the wget command to download the toolchain
$ wget https://downloads.yoctoproject.org/releases/yocto/yocto-3.4.2/toolchain/x86_64/poky-glibc-x86_64-core-image-minimal-cortexa8hf-neon-beaglebone-yocto-toolchain-ext-3.4.2.sh
4. give the executable permissions as
$ chmod 0777 poky-glibc-x86_64-core-image-minimal-cortexa8hf-neon-beaglebone-yocto-toolchain-ext-3.4.2.sh
5. execute the script as
$ ./poky-glibc-x86_64-core-image-minimal-cortexa8hf-neon-beaglebone-yocto-toolchain-ext-3.4.2.sh
Now it will ask for target directory to install the SDK, type . (NOTE : . refers to current directory)
Now it will says "you are about to install the SDK to current directory", press Y
It will extract the SDK contents to current directory
6. Now list the directory contents using "ls" command
$ ls
7. now provide the executable permission to the file "environment-setup-cortexa8hf-neon-poky-linux-gnueabi"
$ chmod 0777 environment-setup-cortexa8hf-neon-poky-linux-gnueabi
8. source the file "environment-setup-cortexa8hf-neon-poky-linux-gnueabi"
$ source environment-setup-cortexa8hf-neon-poky-linux-gnueabi
It will set up the SDK
9. Now verify if your SDK is set to perform from cross-compilation
$ echo $CC
$ echo $CXX
That's it now you have successfully set the SDK for cross-compilation and good to cross-compile the applications for beaglebone black target hardware.
Now lets see the second method, how we can build our own toolchain from scratch using yocto project
pre-requisite : you need to be familiar with my previous topic
https://beagleboneblackonqemu.blogspot.com/2022/03/constructing-embedded-linux-image-for.html
step 1 : Inside the build_bbb folder , run the command as
$ bitbake meta-toolchain
This will starts building our toolchain as per our specified architecture
NOTE: This will take considerable amount of time based on your system configuration, for me its took 2hrs to build toolchain
step 2. Inside build_bbb folder, you can find tmp directory and in inside tmp directory you can find deploy folder , inside deploy folder you can find sdk directory$ cd tmp/deploy/sdk
Here you can find your "poky-glibc-x86_64-meta-toolchain-cortexa8hf-neon-beaglebone-yocto-toolchain-3.1.14.sh" toolchain which was build as per your configuration
step 3: Now you can execute the script as
$ ./poky-glibc-x86_64-meta-toolchain-cortexa8hf-neon-beaglebone-yocto-toolchain-3.1.14.sh


Comments
Post a Comment