Hello All,
In this post I want to explain about how we can construct an embedded Linux image for beagle bone black using yocto project and booting it on QEMU(Quick Emulator) without using the original hardware.
Before moving in to the concepts, we need to get familiar with few things
what is an yocto project?
yocto project helps developers to create their own custom embedded linux distributions for any hardware architecture.
Its an open source project and it provides high quality infrastructure and tools to create embedded linux images
More details about yocto project can be found here: https://www.yoctoproject.org/
Setting up the Build machine:
Prerequisites
----------------
1. 50 GBytes of free disk space
2. Runs a supported Linux distribution (i.e. recent releases of Fedora, openSUSE, CentOS, Debian, or Ubuntu).
3. Git 1.8.3.1 or greater
tar 1.27 or greater
Python 3.4.0 or greater.
Packages and package installation vary depending on your development system.
(*) Install the required packages for Yocto to Work from
https://www.yoctoproject.org/docs/latest/ref-manual/ref-manual.html#ubuntu-packages
$ sudo apt-get install gawk wget git-core diffstat unzip texinfo gcc-multilib build-essential chrpath socat cpio python python3 python3-pip python3-pexpect xz-utils debianutils iputils-ping python3-git python3-jinja2 libegl1-mesa libsdl1.2-dev pylint3 xterm
what is poky?
poky is reference distribution of yocto project . yocto project uses poky to build the images (kernel, system and application SW) for targeted hardware
At high level its a combined repository of the components
- Bitbake
- OpenEmbedded core
- meta-yocto-bsp
- Documentation
what is bitbake?
bitbake is a core component of yocto project. It basically performs the same functionality as of make.
Its a task scheduler that parses the python and shell script mixed code. The code parsed generates and runs tasks, which are basically a set of steps ordered according to code's dependencies.
It reads recipes and follows them by fetching packages, building them and incorporating the results into bootable images.
It keeps track of all tasks being processed in order to ensure completion, maximizing the use of processing resources to reduce build time and being predictable.
workflow of yocto project
Step 1: Download the Poky Source code
$ git clone git://git.yoctoproject.org/poky
Step 2: Checkout the latest branch/release (dunfell)
$ git checkout dunfell
Step 3: Prepare the build environment
Poky provides you a script 'oe-init-build-env', which should be used to setup the build environment
script will set up your environment to use Yocto build system,including adding the BitBake utility to your path
$ source poky/oe-init-build-env [ build_directory ]
Here build_directory is an optional argument for the name of the directory where the environment is set
in case it is not given , it defaults to "build"
The above script will move you in a build folder and create two files ( local.conf, bblayers.conf ) inside conf folder
Step 4: Building Linux Distribution
$ bitbake <image_name>
$ time bitbake core-image-minimal
core-image-minimal
----------------------
This is a small image allowing a device to boot, and it is very useful for kernel and boot loader tests and development
Building embedded linux image for beaglebone black and booting in qemu
Step 1: Download the Poky Source code
$ git clone git://git.yoctoproject.org/poky
$ cd poky
step 2 : checkout to the branch dunfell
$ git checkout dunfell
step 3: download the meta-openembedded source code from github
$ git clone https://github.com/openembedded/meta-openembedded
$ cd meta-openembedded
$ git checkout dunfell
step 4 : inside the poky folder , source the oe-init-build-env script
$ source ./oe-init-build-env build_bbb
This will create a build environment inside the folder build_bbb
step 5 : Go to folder build_bbb and inside build_bbb folder you can observe conf directory with two files named as bblayers.conf and local.conf
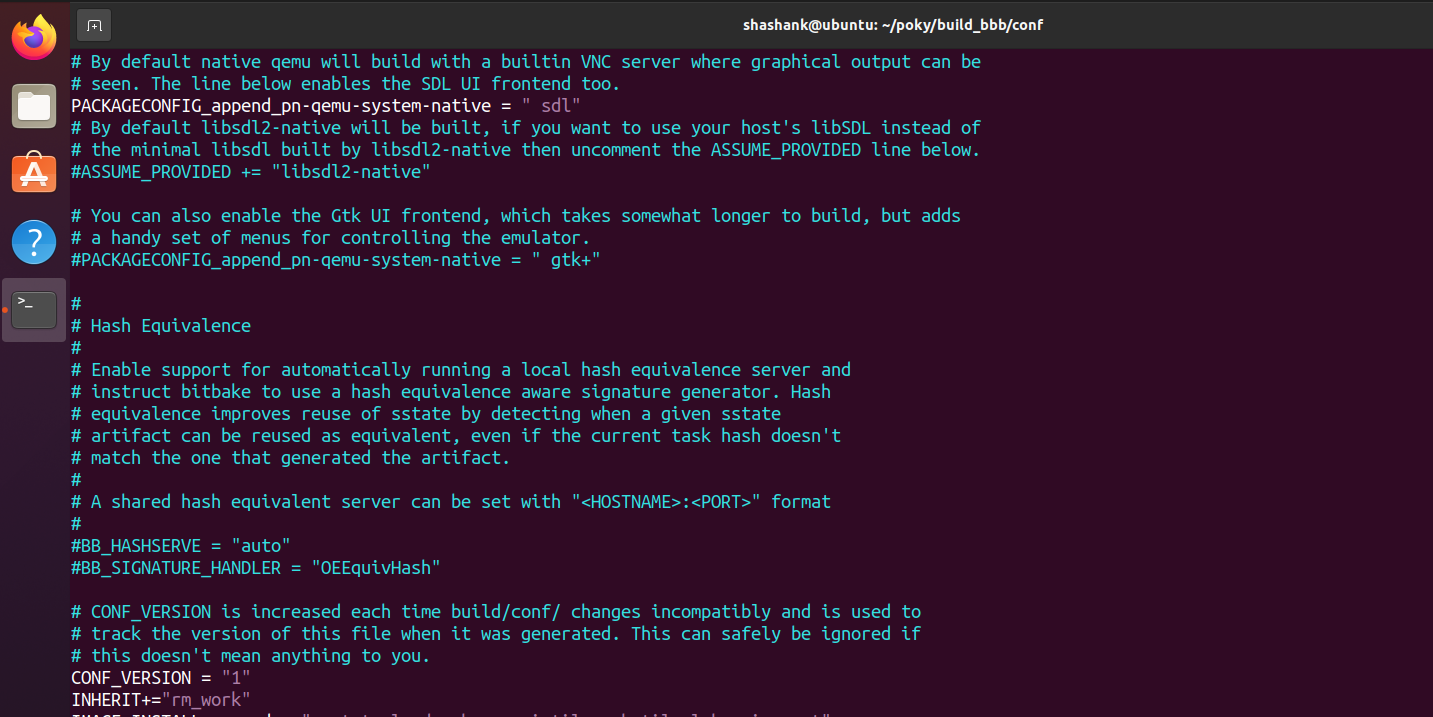
step 6 : Edit the local.conf as below
set the MACHINE variable as MACHINE ?= "beaglebone-yocto"
and append the following line to local.conf file as INHERIT+="rm_work"
INHERIT+="rm_work" will saves the disk space while building the image
Step 7: Now add the openembedded layers to bblayers.conf file as
Inside build_bbb folder , type the following commands:
$ bitbake-layers add-layer /home/shashank/poky/meta-openembedded/meta-oe/
$ bitbake-layers add-layer /home/shashank/poky/meta-openembedded/meta-python/
$ bitbake-layers add-layer /home/shashank/poky/meta-openembedded/meta-networking/
$ bitbake-layers add-layer /home/shashank/poky/meta-openembedded/meta-multimedia/
$ bitbake-layers add-layer /home/shashank/poky/meta-openembedded/meta-filesystem/
$ bitbake-layers add-layer /home/shashank/poky/meta-openembedded/meta-perl/
the final bblayers.conf file should like as
Step 8:
Now we are good to construct our own embedded linux image for beaglebone black target
Inside build_bbb folder run the command as
$ bitbake core-image-minimal
NOTE: The build will take enough amount of time based on your system configuration.
for me it took 2hrs to complete the build as I have 8 core 16 threads CPU
Step 9:
Now boot the image using the following command
$ runqemu beaglebone-yocto nographic
That's it and now you have booted your own custom embedded linux image for beaglebone black hardware
NOTE: beaglebone black image booting on qemu working with following branches
zeus and dunfell
Its important the you were checkout the above branches only while working with yocto


Comments
Post a Comment